Antifouling tips for the perfect result
Jan 31, 2025
At boatcare, we understand that applying antifouling products requires a thoughtful approach, both for the protection of your boat and the environment. Antifouling prevents marine growth by forming a protective layer on the hull of your boat, and applying it correctly ensures long-lasting performance. Here we’ll outline a more detailed, expert-level guide for applying antifouling products, with clear instructions at each step and environmental tips to reduce your ecological impact.
Preparation of the hull
Proper cleaning and preparation are critical for ensuring a smooth application of antifouling. Any dirt, old antifouling residues, or oils left on the hull can compromise the adhesion of the new coat.
1) Clean the hull and remove the old antifouling
If your boat has a previous antifouling layer, it should be removed before applying a new one. You can use a scraper, power washer, or a chemical stripper for tough layers.
- Tip If using biodegradable paint remover always work in a well-ventilated area and follow all safety instructions for chemical products.
- Environmental tip Dispose of old antifouling waste and chemical products properly. Many boatyards offer designated disposal containers for toxic materials, ensuring they don’t pollute nearby water or land.
- Wash and degrease the hull After scraping or power washing, it’s essential to clean the hull with a biodegradable cleaner or degreaser. This ensures that all contaminants are removed and the surface is ready for the new antifouling product.
- Tip Use a soft brush and water to remove any remaining grime, algae, or salt build-up. Work in sections to ensure thorough cleaning.
- Environmental tip Choose eco-friendly cleaning products that won’t harm the environment. Always clean your boat in designated areas with proper drainage systems to prevent any waste water from flowing into local water sources.
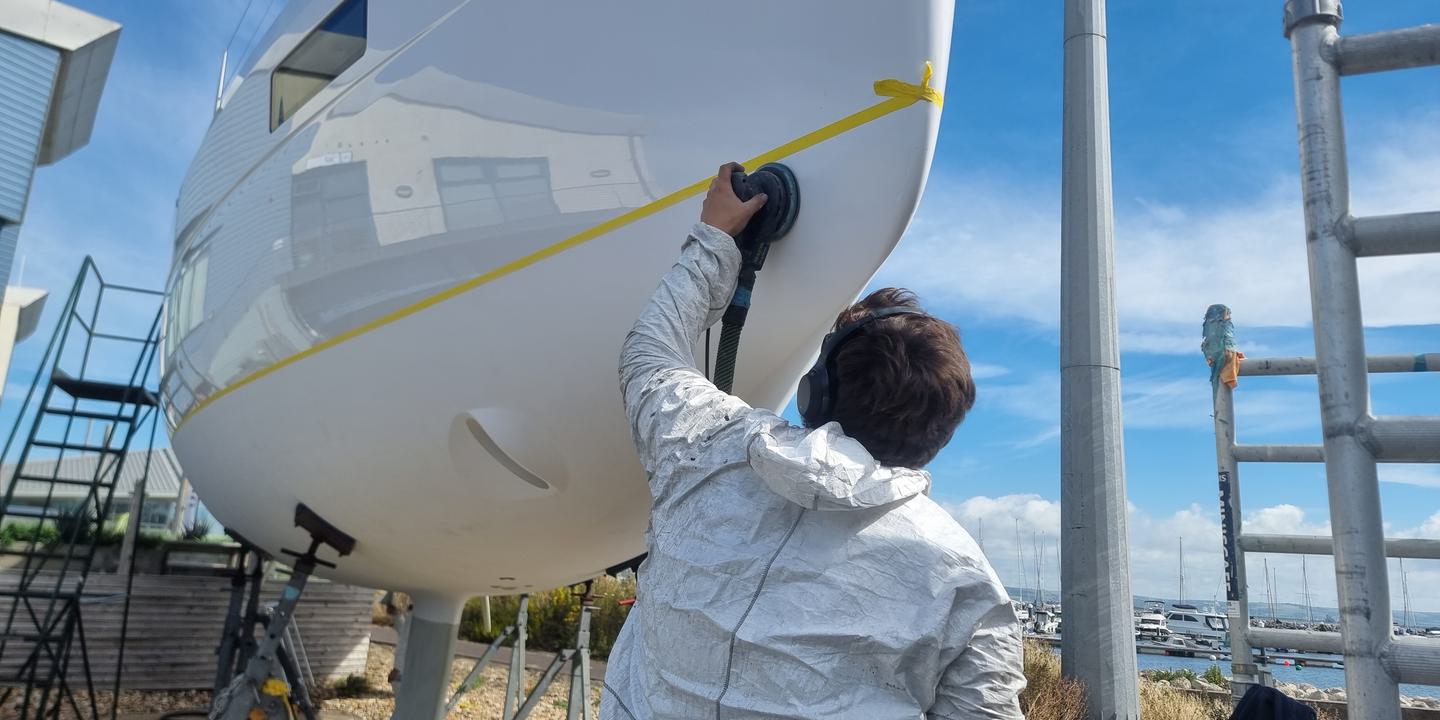
- Sanding the hull Sanding is necessary to provide a fair and keyed surface for the antifouling to bond effectively. You want to sand enough to remove the old coating but not go too deep into the underlying layers.
- Tip Use 80- to 120-grit sandpaper to achieve a smooth, even surface. If you’re reapplying antifouling on a previously painted hull, lightly sand the surface to roughen it.
- Environmental tip Use a vacuum sander with dust collection to prevent sanding dust from contaminating the environment. Dispose of sanding dust in a responsible manner, following local environmental regulations
2) Priming the hull for longevity
Applying the right primer enhances adhesion and creates a solid base for your antifouling. Using the correct primer ensures better bonding, which will help the antifouling perform effectively for a longer time.
- Choose the right primer Use an epoxy-based primer if applying over a previously antifouled or bare hull. But do make sure the primer is compatible with the type of antifouling you plan to apply.
- Tip Apply the primer evenly across the hull using a roller or brush. Avoid over-applying, as thin, even coats are more effective.
- Environmental tip Use low-odour, water-based primers that are less harmful to both you and the environment. Make sure to work in a well-ventilated area to minimise exposure to fumes.
- Let the primer cure Allow the primer to cure completely before moving on to the antifouling layer. Follow the manufacturer's recommended curing times, usually four to six hours for epoxy primers.
- Tip Ensure the primer has dried before applying antifouling; this allows for optimal bonding. Check the weather forecast and avoid applying if rain or high humidity is expected.
3) Mixing and preparing the antifouling coating
Properly mixing the antifouling product ensures that it will work as intended, providing the right protection against marine growth.
- Accurate proportions Many antifouling products come in two parts – a resin and a hardener – that need to be mixed in exact proportions. Be sure to follow the manufacturer’s instructions carefully.
- Tip Mix the components thoroughly using a clean container, stirring for at least three minutes to ensure that the hardener and resin are fully blended.
- Environmental tip To avoid waste, mix only as much as you need. If you’re unsure of how much to mix, always err on the side of caution. Leftover product should be stored in an airtight container or disposed of safely.
- Avoid overworking the product Once mixed, most antifouling products have a limited pot life (working time), so be sure to apply it within the recommended time frame.
- Tip Work in manageable sections, and only mix enough product that you can apply within a few hours.
4) Applying antifouling and the right way to do it
The application of antifouling requires even coverage to ensure that no area is left unprotected. The correct application also ensures durability and longevity.
- First coat Apply the first coat of antifouling using a brush, roller, or spray, depending on the type of product. Use smooth, consistent strokes to avoid uneven coverage.
- Tip Work in sections to maintain control over the application. Avoid applying thick layers – multiple thin layers work best for durability and performance.
- Environmental tip Avoid overspraying and apply only the amount of product needed for each section to minimise waste. Work carefully to ensure you’re not applying antifouling to areas that don’t need it, such as propellers, anodes, or waterlines.
- Second coat After the first coat has dried (usually four to six hours), lightly sand the surface with fine-grit sandpaper (around 220- to 240-grit) to improve adhesion before applying the second coat.
- Tip Sand lightly, just enough to break the surface tension and remove any rough spots. Once sanded, wipe down the hull with a clean cloth to remove dust before applying the second coat.
- Environmental tip Ensure all sanding waste is collected, vacuumed up, and disposed of responsibly
5) Curing and final inspection
Proper curing of the antifouling is crucial to ensure that the product bonds correctly and performs as expected for the full season or longer.
- Allow proper curing After the final coat is applied, ensure that the antifouling cures completely before launching the boat. Cure times vary by product, but typically it will take 24-48 hours for the product to dry fully, with full curing taking up to seven days.
- Tip Don’t rush the curing process. Be patient and ensure the antifouling has hardened before exposing it to water.
- Environmental tip Store the boat in a dry, well-ventilated area to allow the product to cure properly.
- Final inspection Once cured, perform a visual inspection to ensure the antifouling is applied evenly and covers the entire hull.
- Tip Look for any missed spots or thin areas that may need touch-ups. If you notice areas that need more coverage, lightly sand and reapply the antifouling.
- Environmental tip Be careful when cleaning up excess product or waste. Dispose of any leftover materials properly, adhering to local
Minimising impact on the environment
Antifouling, especially with traditional biocide-based products, can have significant environmental consequences if handled incorrectly. Here are key points to keep in mind to reduce your impact:
- Use eco-friendly products Choose antifouling products that are less harmful to the environment. Copper-based antifouling options release copper ions that deter marine growth while being less toxic to marine life compared to traditional biocides like tributyltin (TBT).
- Prevent runoff When applying antifouling, ensure that no product runs off into the surrounding environment. Use tarpaulins and protective sheets, or work in a contained area to capture any overspray or drips. Work in an area with proper drainage systems to avoid contamination of water sources.
- Dispose of waste properly Waste, including old coatings, sanding dust and leftover products, should never be disposed of in regular trash or directly into water. Always use designated hazardous waste disposal facilities at marinas or boatyards.
- Reduce frequency of application By choosing long-lasting, high-performance antifouling solutions you reduce the need for frequent reapplications, minimising the volume of toxic materials being released into the environment over time.
Conclusion Antifouling is both a technical challenge and a critical responsibility for the boating community. While fouling is a natural process, unchecked growth can have far-reaching consequences for performance, costs, and marine health. Thanks to advances in science and technology, today’s boaters have a range of effective and sustainable options at their disposal. International regulations may drive greater consistency in antifouling practices, particularly as concerns about the spread of invasive species and marine pollution grow. The next time you’re out on the water, take a moment to appreciate the sleekness of a clean hull – and remember that antifouling isn’t just about speed; it’s about safeguarding the delicate balance of our oceans.